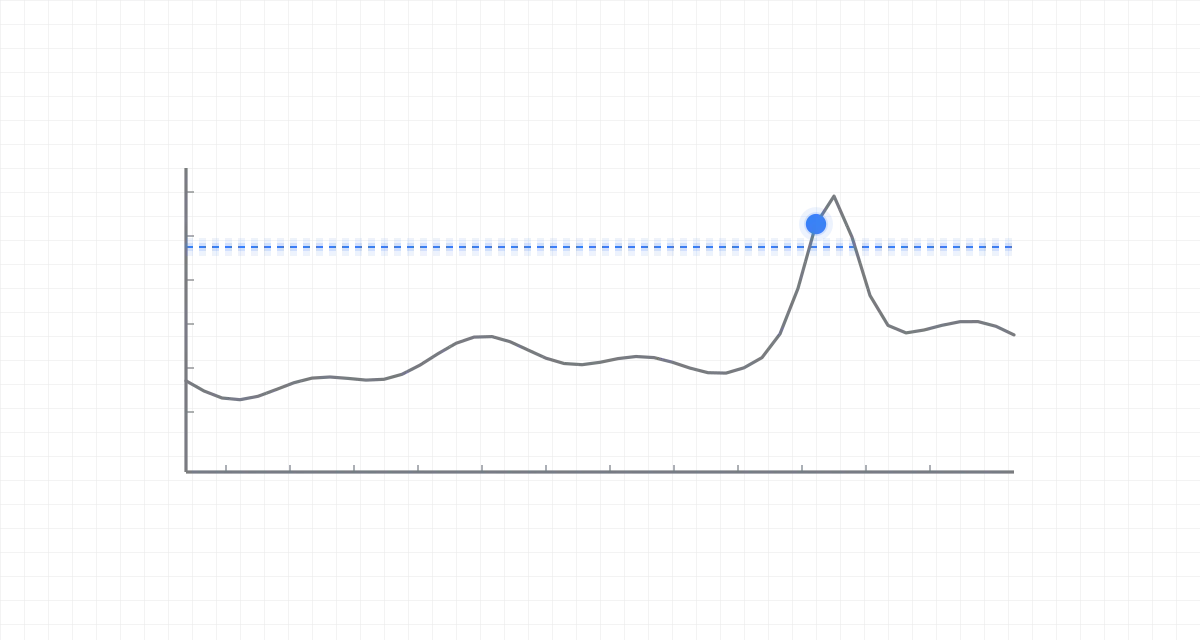
A bearing doesn’t fail without warning. It screams — in frequencies you can’t hear. The trick is listening at the right frequency, recognizing the pattern, and acting before the $80 bearing destroys the $40,000 spindle.
This post walks through building a complete predictive maintenance pipeline in Node-RED: from raw accelerometer data to a health score your maintenance team can act on.
Why Predictive Maintenance?#
Three maintenance strategies exist. Only one saves money without accepting unplanned downtime:
| Strategy | Approach | Downtime | Cost | Risk |
|---|---|---|---|---|
| Reactive | Fix it when it breaks | Unplanned, long | High (emergency parts, overtime labor, production loss) | Catastrophic secondary damage |
| Preventive | Replace parts on a schedule | Planned, frequent | Medium (premature replacements, over-maintenance) | Still fails between intervals |
| Predictive | Replace parts based on condition | Planned, minimal | Low (replace only what’s degrading) | Requires instrumentation & analytics |
The math is straightforward: a single unplanned stop on a CNC line costs €5,000–€50,000 depending on production value. A vibration sensor costs €200. The ROI writes itself — but only if you can turn sensor data into actionable decisions.
The Pipeline Architecture#
The full pipeline in Node-RED looks like this:
Each stage transforms data: raw acceleration → frequency spectrum → anomaly flags → health percentage → remaining useful life → maintenance work orders.
Stage 1: Vibration Data Collection#
Sensor Selection#
Industrial vibration monitoring uses piezoelectric accelerometers mounted on bearing housings. The key parameters:
| Parameter | Typical Value | Why It Matters |
|---|---|---|
| Frequency range | 0.5 Hz – 10 kHz | Must cover bearing fault frequencies |
| Sensitivity | 100 mV/g | Higher = better for low-vibration machines |
| Sampling rate | 25.6 kHz | Nyquist: ≥2× highest frequency of interest |
| Dynamic range | ±50g peak | Covers normal operation through severe faults |
| Mounting | Stud mount (best), magnet, adhesive | Stud gives best high-frequency response |
Bearing Fault Frequencies#
Every rolling element bearing has characteristic defect frequencies determined by its geometry. When a defect develops, it produces impacts at a specific repetition rate:
BPFO = (N/2) × RPM × (1 - Bd/(Pd) × cos(θ))    ← Outer race defect
BPFI = (N/2) × RPM × (1 + Bd/(Pd) × cos(θ))    ← Inner race defect
BSF  = (Pd/(2×Bd)) × RPM × (1 - (Bd/(Pd))² × cos²(θ))  ← Ball defect
FTF  = RPM/2 × (1 - Bd/(Pd) × cos(θ))          ← Cage defect

Where:
  N  = Number of rolling elements
  Bd = Ball diameter
  Pd = Pitch diameter
  θ  = Contact angle
For a standard 6205 bearing at 1800 RPM: BPFO ≈ 107 Hz, BPFI ≈ 163 Hz, BSF ≈ 70 Hz. These are the frequencies you watch in the spectrum.
Data Ingestion in Node-RED#
Most industrial vibration sensors publish via MQTT or OPC-UA. A typical Node-RED ingestion flow:
The buffer node collects 1024 samples before sending a complete block to the FFT node. At 25.6 kHz sampling, that’s a new FFT every 40 ms — fast enough for real-time monitoring.
Stage 2: Signal Processing — FFT Analysis#
The Fast Fourier Transform converts time-domain vibration data into a frequency spectrum, revealing which bearing fault frequencies are active.
Python FFT Implementation#
The heavy signal processing runs in a Python subprocess called from Node-RED via node-red-contrib-pythonshell or an exec node:
import numpy as np
from scipy.fft import rfft, rfftfreq
from scipy.signal import welch
import json
import sys

def analyze_vibration(samples: list[float], sample_rate: float = 25600.0) -> dict:
    """Compute frequency spectrum and key vibration metrics."""
    signal = np.array(samples)

    signal = signal - np.mean(signal)

    freqs = rfftfreq(len(signal), 1.0 / sample_rate)
    spectrum = np.abs(rfft(signal)) * 2.0 / len(signal)

    f_welch, psd = welch(signal, fs=sample_rate, nperseg=min(256, len(signal)))

    rms = np.sqrt(np.mean(signal ** 2))
    peak = np.max(np.abs(signal))
    crest_factor = peak / rms if rms > 0 else 0
    kurtosis = float(np.mean((signal - np.mean(signal)) ** 4) /
                      (np.std(signal) ** 4)) if np.std(signal) > 0 else 0

    return {
        "rms_g": round(float(rms), 4),
        "peak_g": round(float(peak), 4),
        "crest_factor": round(float(crest_factor), 2),
        "kurtosis": round(float(kurtosis), 2),
        "spectrum": {
            "frequencies": freqs[:500].tolist(),
            "amplitudes": spectrum[:500].tolist(),
        },
        "psd": {
            "frequencies": f_welch.tolist(),
            "power": psd.tolist(),
        },
    }

if __name__ == "__main__":
    data = json.loads(sys.stdin.read())
    result = analyze_vibration(data["samples"], data.get("sample_rate", 25600))
    print(json.dumps(result))
Key Vibration Metrics#
| Metric | Normal Range | What It Indicates |
|---|---|---|
| RMS velocity (mm/s) | 0.7 – 4.5 | Overall vibration severity (ISO 10816) |
| Peak acceleration (g) | < 5g | Impact severity |
| Crest factor | 3 – 6 | Ratio of peak to RMS. >6 suggests impacting |
| Kurtosis | ~3 (Gaussian) | >4 suggests bearing defects developing |
Units matter. ISO 10816/20816 severity zones are defined for velocity RMS in mm/s (typically the 10–1000 Hz band), not for acceleration. The
rms_g/peak_greturned above are computed from the raw accelerometer signal and are separate acceleration metrics. To compare against the ISO velocity thresholds, the acceleration signal must first be integrated to velocity — in the frequency domain this means dividing the FFT by jω (with a high-pass to suppress integration drift) before computing RMS. The pipeline below does not include that integration step, so treat the g-based RMS/peak as acceleration trends rather than ISO-velocity values.
Monitoring Fault Frequencies#
Extract amplitude at specific bearing fault frequencies:
def extract_fault_amplitudes(
    freqs: np.ndarray,
    spectrum: np.ndarray,
    bearing_freqs: dict[str, float],
    bandwidth: float = 5.0,
) -> dict[str, float]:
    """Extract spectral amplitude at known fault frequencies ± bandwidth."""
    results = {}
    for name, target_freq in bearing_freqs.items():
        mask = (freqs >= target_freq - bandwidth) & (freqs <= target_freq + bandwidth)
        if np.any(mask):
            results[name] = round(float(np.max(spectrum[mask])), 6)
        else:
            results[name] = 0.0
    return results

bearing_6205_1800rpm = {
    "BPFO": 107.0,
    "BPFI": 163.0,
    "BSF": 70.0,
    "FTF": 11.9,
    "2x_BPFO": 214.0,
    "3x_BPFO": 321.0,
}
When a bearing defect develops, the amplitude at the corresponding fault frequency rises — first at 1× the fault frequency, then at harmonics (2×, 3×). This progression is the signature of bearing degradation.
Stage 3: Anomaly Detection#
Three complementary anomaly detection methods, each with different strengths:
Method 1: Z-Score (Simple, Fast)#
Flags values that deviate significantly from the historical mean. Best for stationary processes with known baselines:
def zscore_anomaly(
    value: float,
    historical_mean: float,
    historical_std: float,
    threshold: float = 3.0,
) -> dict:
    if historical_std == 0:
        return {"z_score": 0.0, "anomaly": False}
    z = (value - historical_mean) / historical_std
    return {
        "z_score": round(z, 3),
        "anomaly": abs(z) > threshold,
    }
Limitation: a slowly drifting signal might never trigger a Z-Score alert because the mean shifts with it. That’s where CUSUM comes in.
Method 2: CUSUM (Cumulative Sum — Detects Drift)#
Accumulates small deviations over time. Catches gradual degradation that Z-Score misses:
def cusum_detector(
    values: list[float],
    target: float,
    threshold: float = 5.0,
    drift: float = 0.5,
) -> dict:
    """Tabular CUSUM for detecting mean shifts."""
    s_pos = 0.0
    s_neg = 0.0
    alarms = []

    for i, x in enumerate(values):
        s_pos = max(0, s_pos + (x - target) - drift)
        s_neg = max(0, s_neg - (x - target) - drift)

        if s_pos > threshold or s_neg > threshold:
            alarms.append({
                "index": i,
                "value": x,
                "s_pos": round(s_pos, 3),
                "s_neg": round(s_neg, 3),
            })

    return {
        "alarm_count": len(alarms),
        "alarms": alarms,
        "final_s_pos": round(s_pos, 3),
        "final_s_neg": round(s_neg, 3),
    }
Method 3: Isolation Forest (Multi-dimensional, ML-based)#
For multi-sensor scenarios where the anomaly is in the relationship between features, not any single value:
from sklearn.ensemble import IsolationForest
import numpy as np

def train_isolation_forest(
    training_data: np.ndarray,
    contamination: float = 0.01,
) -> IsolationForest:
    """Train on normal operation data. contamination = expected anomaly fraction."""
    model = IsolationForest(
        n_estimators=200,
        contamination=contamination,
        random_state=42,
    )
    model.fit(training_data)
    return model

def predict_anomaly(model: IsolationForest, features: np.ndarray) -> dict:
    """Score new observations. -1 = anomaly, 1 = normal."""
    prediction = model.predict(features.reshape(1, -1))[0]
    score = model.score_samples(features.reshape(1, -1))[0]
    return {
        "anomaly": prediction == -1,
        "anomaly_score": round(float(score), 4),
    }

# Feature vector: [rms, peak, kurtosis, bpfo_amp, bpfi_amp, temperature]
features = np.array([0.45, 2.1, 3.8, 0.0012, 0.0008, 62.0])
Choosing the Right Method#
| Method | Speed | Drift Detection | Multi-Sensor | Setup Effort |
|---|---|---|---|---|
| Z-Score | ~1 µs | Poor | No | Minimal (mean + std) |
| CUSUM | ~10 µs | Excellent | No | Moderate (tune drift + threshold) |
| Isolation Forest | ~100 µs | Good | Yes | High (training data needed) |
In practice, use all three in parallel. Z-Score catches sudden spikes, CUSUM catches slow drift, and Isolation Forest catches multi-dimensional anomalies.
Stage 4: Health Index Calculation#
A single health score (0–100%) that operators can understand, derived from multiple sensor inputs:
def calculate_health_index(
    metrics: dict[str, float],
    thresholds: dict[str, dict],
) -> dict:
    """
    Weighted multi-sensor health index.
    Each sensor contributes a partial score based on its deviation from
    normal → warning → critical thresholds.
    """
    total_weight = 0.0
    weighted_score = 0.0

    component_scores = {}

    for sensor, config in thresholds.items():
        value = metrics.get(sensor, 0.0)
        weight = config["weight"]
        normal = config["normal"]
        warning = config["warning"]
        critical = config["critical"]

        if value <= normal:
            score = 100.0
        elif value <= warning:
            score = 100.0 - 50.0 * (value - normal) / (warning - normal)
        elif value <= critical:
            score = 50.0 - 50.0 * (value - warning) / (critical - warning)
        else:
            score = 0.0

        component_scores[sensor] = round(score, 1)
        weighted_score += score * weight
        total_weight += weight

    health = weighted_score / total_weight if total_weight > 0 else 0.0

    return {
        "health_index": round(health, 1),
        "status": (
            "healthy" if health >= 80
            else "warning" if health >= 50
            else "critical"
        ),
        "components": component_scores,
    }

thresholds = {
    # NOTE: ISO 10816/20816 zones below are velocity RMS in mm/s. Feed this key
    # the *velocity* RMS — integrate the acceleration signal to velocity first
    # (FFT / jω with a high-pass). Do NOT pass the g-based `rms` directly here.
    "rms_velocity": {"weight": 3, "normal": 1.8, "warning": 4.5, "critical": 7.1},
    "kurtosis": {"weight": 2, "normal": 3.5, "warning": 5.0, "critical": 8.0},
    "bpfo_amplitude": {"weight": 4, "normal": 0.001, "warning": 0.005, "critical": 0.02},
    "temperature": {"weight": 1, "normal": 65, "warning": 80, "critical": 95},
}
The weights reflect how diagnostic each measurement is. Bearing fault frequency amplitude (weight 4) is a stronger predictor of bearing failure than overall temperature (weight 1).
Stage 5: Remaining Useful Life (RUL) Prediction#
Once you detect degradation, the next question is: how long until failure? The Weibull distribution models time-to-failure based on the degradation curve:
from scipy.stats import weibull_min
import numpy as np

def estimate_rul(
    health_history: list[float],
    timestamps_hours: list[float],
    failure_threshold: float = 20.0,
) -> dict:
    """
    Estimate remaining useful life via Weibull-based degradation modeling.
    Fits a degradation curve and extrapolates to the failure threshold.
    """
    h = np.array(health_history)
    t = np.array(timestamps_hours)

    if len(h) < 10:
        return {"rul_hours": None, "confidence": "insufficient_data"}

    degradation_rate = np.polyfit(t, h, deg=1)[0]

    if degradation_rate >= 0:
        return {"rul_hours": None, "confidence": "no_degradation_detected"}

    current_health = h[-1]
    rul_linear = (current_health - failure_threshold) / abs(degradation_rate)

    rates = []
    window = max(5, len(h) // 4)
    for i in range(len(h) - window):
        segment_rate = (h[i + window] - h[i]) / (t[i + window] - t[i])
        if segment_rate < 0:
            rates.append(abs(segment_rate))

    if rates:
        shape, _, scale = weibull_min.fit(rates, floc=0)
        p10 = weibull_min.ppf(0.10, shape, loc=0, scale=scale)
        p90 = weibull_min.ppf(0.90, shape, loc=0, scale=scale)
        rul_upper = (current_health - failure_threshold) / p10 if p10 > 0 else rul_linear * 2
        rul_lower = (current_health - failure_threshold) / p90 if p90 > 0 else rul_linear * 0.5
    else:
        rul_upper = rul_linear * 1.5
        rul_lower = rul_linear * 0.5

    return {
        "rul_hours": round(rul_linear, 1),
        "rul_range": [round(rul_lower, 1), round(rul_upper, 1)],
        "confidence": "high" if len(h) > 100 else "moderate",
        "degradation_rate_per_hour": round(abs(degradation_rate), 4),
    }
The output: “This bearing has approximately 340 ± 80 hours of useful life remaining.” Maintenance can schedule a replacement during the next planned downtime.
Node-RED Flow Architecture#
The complete flow in Node-RED, using the node-red-contrib-condition-monitoring package:
Key Node-RED Nodes Used#
| Node | Source | Purpose |
|---|---|---|
mqtt in | Core | Ingest sensor data |
opc-ua client | node-red-contrib-opcua | Read PLC values |
buffer | Custom function node | Collect N samples |
python-shell | node-red-contrib-pythonshell | Run FFT & ML models |
condition-monitoring | node-red-contrib-condition-monitoring | RMS, peak, crest factor |
influxdb out | node-red-contrib-influxdb | Store time-series data |
dashboard gauge | node-red-dashboard | Real-time operator display |
Deployment Considerations#
Sampling Strategy#
You don’t need continuous high-frequency monitoring for every machine. A practical approach:
- Critical machines: Continuous monitoring at 25.6 kHz
- Important machines: 10-second burst every 5 minutes
- Standard machines: 10-second burst every hour
At 25.6 kHz × 2 bytes × 10 seconds = 512 KB per burst. Even with 100 machines, hourly monitoring generates only ~50 MB/hour — well within edge gateway capacity.
Alert Escalation#
| Health Index | Status | Action |
|---|---|---|
| ≥ 80 % | Green | No action |
| 50–79 % | Yellow | Log to CMMS, notify maintenance planner |
| 20–49 % | Orange | Priority work order, order spare parts |
| < 20 % | Red | Immediate attention, schedule emergency stop |
Baseline Period#
Every machine needs a learning period during known-good operation to establish normal baselines. Collect at least 2 weeks of data across different load conditions, speeds, and ambient temperatures before enabling alerts.
Conclusion#
Predictive maintenance is not magic — it’s signal processing plus statistics, deployed close to the machine. The pipeline is always the same: sense → transform → detect → decide → act. Node-RED’s visual flow model makes each stage visible and debuggable, which matters when a maintenance engineer — not a data scientist — needs to understand why the system flagged a machine.
The most common mistake is jumping straight to complex ML models. Start with RMS trending and Z-Score alerts. That alone catches a large share of developing failures. Add FFT-based fault frequency monitoring next. Only bring in Isolation Forest and RUL prediction when you have enough failure history to validate the models.
A sensor on a bearing is cheap. An unplanned line stop is not. The gap between the two is software — and that software doesn’t need to be complicated.